
Two key functions that the transmission fluid performs are cleaning and lubricating the inside assembly of a transmission. As it circulates via the transmissions gears and bands it collects metal shavings and dirt that accumulate over time. The reason why it is critical to remove this debris before pouring any fresh fluid into the transmission is precisely the fact that debris in the transmission fluid leads to significantly more wear on the internals of the transmission. In the end, nothing prolongs the life of a vehicle more than consistent fluid changes. Doing it yourself saves you time and money and will surely make your gearbox performance better than before. Transmission fluid should be changed after every 48,000 – 97,000 kilometers or even more, depending on your vehicle owner’s manual. The 4R70W transmission is the example transmission we are using to describe how to change the transmission fluid. If you need to purchase a rebuilt 4R70W transmission the best place to look is at https://reman-transmission.com/.
Steps on How to Change the Transmission Fluid
Step 1:
Use a dipstick to confirm the level of the transmission fluid. Automatic transmission fluid or ATF is the transmission fluid that is used in self-shifting or automatic vehicles. It is usually green or red to differentiate it from other vehicle fluids. The dipstick has a red handle that is clearly labeled and is easily accessible in most cars. A dipstick will either list a cold or hot reading. If the engine hasn’t been running in about sixty minutes and you don’t live in a very hot climate, check the Cold Reading to get the proper levels. In case the fluid is clean, but the levels read low, you can top off your system. If the fluid is sludgy or discolored, consider changing it.
Step 2:
Lift the vehicle using jack stands or a car lift. At all times, park on a very flat surface. Using a floor jack stand, raise the car off the ground. Use the lift points recommended by the manufacturer to prevent damaging the vehicle’s undercarriage. Ensure you have sufficient room for you to squeeze under your vehicle. Use chucks, support stands, and any other suitable bracing for safety purposes, should the jack fail or the car tries to roll off the ramps. To prevent it from rolling, install wheel chocks to the vehicle’s lifted opposite end.
Step 3:
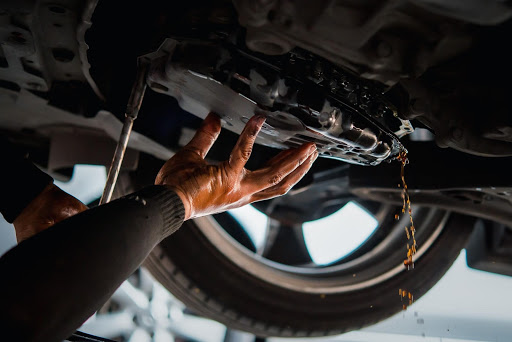
Find the transmission oil pan. The pan is attached just beneath the transmission and has 6 to 8 bolts. This means that you will have to crawl under the vehicle to find it. For rear-wheel-drive vehicles, the fluid pan is below the center console region, and it faces front to back, while for the front-wheel vehicles, it is located left-to-right below the engine bay. Examine the oil pan. In some vehicles, you can drain the fluid by simply removing the drain plug at the center of the oil pan, and the fluid will drain into a receptacle. However, on some vehicles, you must remove the pan entirely.
Step 3.1:
Place a drip pan or container under the oil pan to collect the old oil. Draining the transmission fluid can be very messy if you don’t have a drain plug. The fluid will be all over the pan rather than go via the drain plug hole. To avoid making a mess, use a drip pan that is at least as wide as your transmission pan or wider if warranted.
Step 3.2:
Drain the transmission fluid. To do this, remove the drain plug from the transmission pan or the pan entirely. The fluid will start to drain immediately but may take several minutes to drain completely. If there’s a drain plug on the transmission pan, pull the plug and drain the fluid into the collection pan. The pan should hold up to 10 quarts of fluid. If you must remove the whole transmission pan, loosen the two topmost bolts almost halfway, then remove the other bolts completely to allow the fluid to start draining properly.
Step 4:
Replace the transmission gasket, pan, and filter appropriately. Remove any dust or dirt to ensure the transition mating surfaces and transmission pan are clean. Remove the transmission pan gasket and the filter before you install new parts.
Step 5:
Tighten the transmission pan bolts down to factory spec after completely draining the fluid and putting in a new gasket and filter.
Step 6:
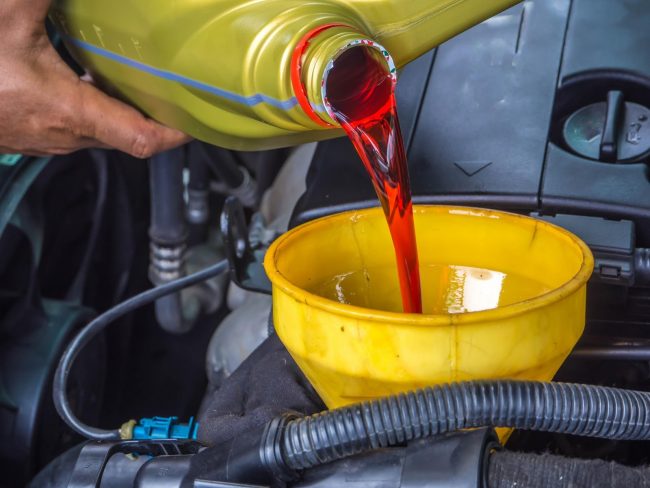
Open the hood, then pull out the ATF dipstick. Put a funnel to pour the fresh liquid via the funnel.
Step 7:
Pull out the funnel, reinstall your dipstick, and then close the hood. Transmission fluid is harmful to the environment; hence, it is crucial that you drain and dispose of the ATF properly as the last and final step. Congrats, if you’ve made it this far your vehicle is fully serviced and ready to get back out on the road.
NOTE:
If you want to know the trick to increased transmission longevity in the long-term, check out this article.